Sunday, March 18, 2012

Mad Men Cupcakes


The Inspiration

Mad Men fever is back! As any fan knows, next week is the season premier after a seemingly endless break. While I don't plan to hold a viewing party, I had reason to celebrate the show this weekend because my friend Daphne's well-timed Mad Men themed birthday party was held last night. The party was such a blast, everyone really got into the spirit of theme - lots of slim-fitting suits, strands of pearls and up-dos. I thought about bringing classic cocktail-inspired cupcakes, or even the crowd-pleasing Irish Car Bomb cupcakes, especially since yesterday happened to be St. Patrick's Day (see my post from the 2011 Superbowl). In the end, I decided to go with a simple chocolate devil food cake with butter cream frosting. This would allow the time I needed to focus on a new challenge: fondant decorations. I've never worked with fondant before, so this was definitely uncharted territory for me, but felt like this would be the perfect opportunity to try something new. At first i thought of creating images of cocktail glasses, but felt like that wasn't right...it could be for any party. The challenge for me was to find something that was specific to Mad Men. That's when I realized I had the perfect tool to create the images I needed - MadMenYourself.com. I went to the site and created six new avatars - 3 men and 3 ladies:


Fun with Fondant

I bought a package of Wilton's rolled fondant which is plain white and comes in the shape of a brick. i divided it into sections to dye. i used Wilton's concentrated gel food coloring. It was very easy to work with and the fondant took the color very well. I recommend using thin latex gloves when working in the dye. Red dye especially doesn't wash off very easily - my palms were still pink after several washings.

The Arsenal:


I dyed all the fondant I thought I would need, and wrapped each color in plastic to prevent it from drying out. I then started work on getting the templates made for each character. I decided to make the images as large as possible, which meant only the head and shoulders would fit on top of the cupcake. I worked on each component in sections: head, hair, clothes and accessories. I saved the facial features for last.

Heads (with facial features partially completed), Hair, Clothes & Accessories:


When working with fondant, if it starts to get too sticky, you can use a little cornstarch on the work surface. Use only a little bit though. The fondant should be at room temperature and rolled out to about 1/8" thickness. When putting together the components, the fondant should be pliable so each piece can stick together. i kept the pieces flat in a zip lock bag until I was ready to use them. For any pieces that were not sticking together, I used some of the buttercream frosting as glue. To make the faces, i "drew" the features using the pointed tip of a wooden skewer to make the impression and then painted over it using decorating icing from a tube (I used Wilton). I don't recommend using decorating gel because it's too sheer. I also find decorating using small paint brushes easier than using a decorating tip - I find those hard to control at times, especially with very small details).

Putting together the characters was a lot of fun, it felt like playing with Colorforms as a kid.

Partially-completed:


In the end, I was pleased with the outcome. I spent a lot of time working on the facial features, which caused the fondant to dry out a bit, but they held up pretty well when applying the hair and accessories. The cupcakes themselves turned out to be the most frustrating. I tried this "one bowl" devil's food cake recipe on the package of Ghiradelli chocolate I had. It was intended for a 9x13 cake pan and when the cupcakes came out of the oven, they immediately collapsed. Pressed for time, I wound up buying a Duncan Hines devil's food cake mix. At least the buttercream I made was flawless.

Mad Men Ladies (on a vintage platter):


I love this chick, she's sassy:


Here are the six characters that are as close to the originals I created on the Mad Men site:


And here's all 18 (i made just enough to fill my cupcake display stand):

Wednesday, March 14, 2012

Happy Pi Day!


One day I will make a Pi pie like the one above, but for now, I'll just post some of the pies i've baked in the past year or so that never got blogged.

1. Unbaked Strawberry Rhubarb Pi


2. Mini Blueberry Pi


3. Thanksgiving Day Apple Pi


Tuesday, March 13, 2012

VirgyGirl Scout Cookies


One of the best things about my new job is the baking club that I was invited to join soon after I joined the company. We bake every other week and this week's theme was "snack food remix" - the goal was to take a processed baked good or candy bar and make it from scratch. I chose my favorite Girl Scout cookie, Samoas. I knew it was going to be difficult to replicate and anticipated it to be a very time consuming process - which it definitely turned out to be. I recommend baking the shortbread cookie component ahead of time, in order to break up the time spent making these cookies. There are four phases to making these cookies: 1) baking the shortbread cookie, 2) making the coconut/caramel topping, 3) adding melted chocolate to the bottom, and 4) adding chocolate stripes to the top. I also recommend making these cookies when you are not pressed for time and definitely listen to some happy music. I listened to my Buddy Holly station on Pandora while baking.

Before getting started, make sure you have these items on hand:

1) parchment paper
2) wax paper
3) double boiler for melting the chocolate
4) pastry bag with small round tip for piping the chocolate stripes
5) round cookie cutter, about 2" diameter, with a smaller round cookie cutter, about 1/2" diameter to cut out the center of the larger cookie. I used a Linzer tart cookie cutter. I like the detail of the edge.


Shortbread cookie:

1 cup butter, room temperature
1/2 cup sugar
2 cups flour
1/4 tsp baking powder
1/2 tsp salt
1/2 tsp vanilla

Beat butter and sugar until combined. In a separate bowl, whisk flour, baking powder and salt, then add to butter/sugar mixture. beat until combined, and add vanilla. If dough is not pulling together, add a little milk. Form dough into a disk and roll out between two pieces of wax paper until the dough is no more than 1/4" thick. Cut out shapes using the round cookie cutters. Set cookies on a parchment-lined baking sheet, bake in oven for 10-12 minutes at 350.


Allow cookies to cool a little bit on the baking sheet before transferring to a wire rack to cool completely. Once all cookies have cooled completely, you can begin on the second phase of the process.

Coconut/Caramel topping

3 cups shredded coconut (I used sweetened coconut)
12-14 oz bag of soft caramels (you can also make your own caramel if you have lots of free time)
1/4 tsp salt
3 tbsp milk

To toast the coconut, heat the oven to 300 and spread the coconut evenly on a parchment-lined baking sheet. Toast for 20 minutes, stirring every 5 minutes, until coconut is golden. Allow to cool.


While the coconut cools, unwrap all of the caramels and place them along with the salt and milk in a large bowl (bowl will need to be large enough to stir in the coconut once the caramel is melted. Microwave on high for 3-4 minutes, stirring occasionally.
When totally smooth, fold in toasted coconut.


Using a small spoon, scoop up the coconut/caramel mixture and place on top of the shortbread cookie. With fingers covered in butter, form the mixture into a circle, and lightly press it on the cookie to ensure it will set properly and not separate from the cookie. Reheat coconut/caramel for a few seconds in the microwave if it becomes difficult to mold.


Allow topping to cool completely before starting the chocolate phase of the process. turn all cookies over so the bottom of the shortbread is facing up. make sure all cookies are on a parchment-lined surface. In a double boiler, melt half of one 10-12 oz bag of semi-sweet chocolate chips. I used Hershey's chocolate chips. Using a butter knife or a small spatula, spread a thin layer of the melted chocolate on the bottom of the cookie. Keep the bottom of the cookie face up and allow to cool completely.


Once all cookies are cooled, (I put mine in the refrigerator to ensure the chocolate had hardened) flip them over so that the coconut/caramel side is facing up. Melt the remaining 1/2 of the bag of chocolate chips and pour into a pastry bag. Pipe 4-5 stripes across the top of each cookie. Put back into the refrigerator to allow chocolate to harden.


And you now can have your very own Girl Scout cookies, whenever you want!

Monday, February 28, 2011

Strawberry-Champagne Cupcakes!


For the Oscars, I wanted to make cupcakes that would fit in with the celebration, so I decided to try strawberry-Champagne cupcakes. These were really easy to make, especially since I used a cake mix. This gave me more time to spend on the decorations.

What's great about making these cupcakes is that there's plenty of leftover Champagne and strawberries to enjoy while baking.


This is an illustration of my grandmother from 1930s. I love her outfit - she would have fit right in at the Oscars.


oven: 350
baking time: 17-20 min

Cupcakes

1 box Betty Crocker Super Moist Vanilla Cake Mix
1 1/4 cups dry Champagne (to replace the water in the cake mix)
1/3 cup vegetable oil
3 egg whites (instead of 3 whole eggs listed on the cake mix box)
1 1/2 cups chopped fresh strawberries (cut in smallish pieces)

Frosting

1 cup butter, softened
4 cups powdered sugar
1/2 cup Champagne
1-2 tsp vanilla extract

Directions

combine cake ingredients, mix well. fold in strawberries and fill baking cups 3/4 full.


Bake until toothpick comes out clean in center of cupcake. Remove from tin and allow to cool completely on rack.


Whip the butter on medium speed for a few minutes until light and fluffy. add the powdered sugar slowly, and add Champagne and vanilla. The frosting will have a light consistency, similar to whipped cream. Fill pastry bag with frosting and decorate the cupcakes using a large star tip.


For the Oscar theme decorations, I didn't have much readily available to use, so I had to get creative. I found a good image of the Oscar statuette online, reduced it in size and printed out several on a sheet of paper. i flipped the image to get the reverse side so I could glue the two sides together on a toothpick. It was tricky and tedious work to cut out such a small image, but the result was pretty awesome.


I cut up strawberries into quarters to lay on top of the cupcakes, not only to give them more color, but also to simulate the red carpet. I also considered using red sugars, but didn't want to make the frosting too sweet. The strawberries looked good, but caused the frosting to break down a bit and get a little drippy. Maybe next time I'll dye the frosting red to get the look of the red carpet.


I found some red fabric, which I used to cover a tray and add to the red carpet look. i liked how the red fabric reflected in the silver baking cups.

The cupcakes were a big hit - the flavor of the Champagne really came through in both the cake and the frosting. Next time I'll try making the cake from scratch.

As for the Oscars, I managed to accurately guess the winners for 16 of the 24 awards, which isn't bad considering I saw only a couple of the films nominated. I even won my own statuette for placing third in the pool organized by a coworker. I should incorporate Pez into a cupcake. That would be sweet.

Monday, February 7, 2011

Super Bowl Cupcakes


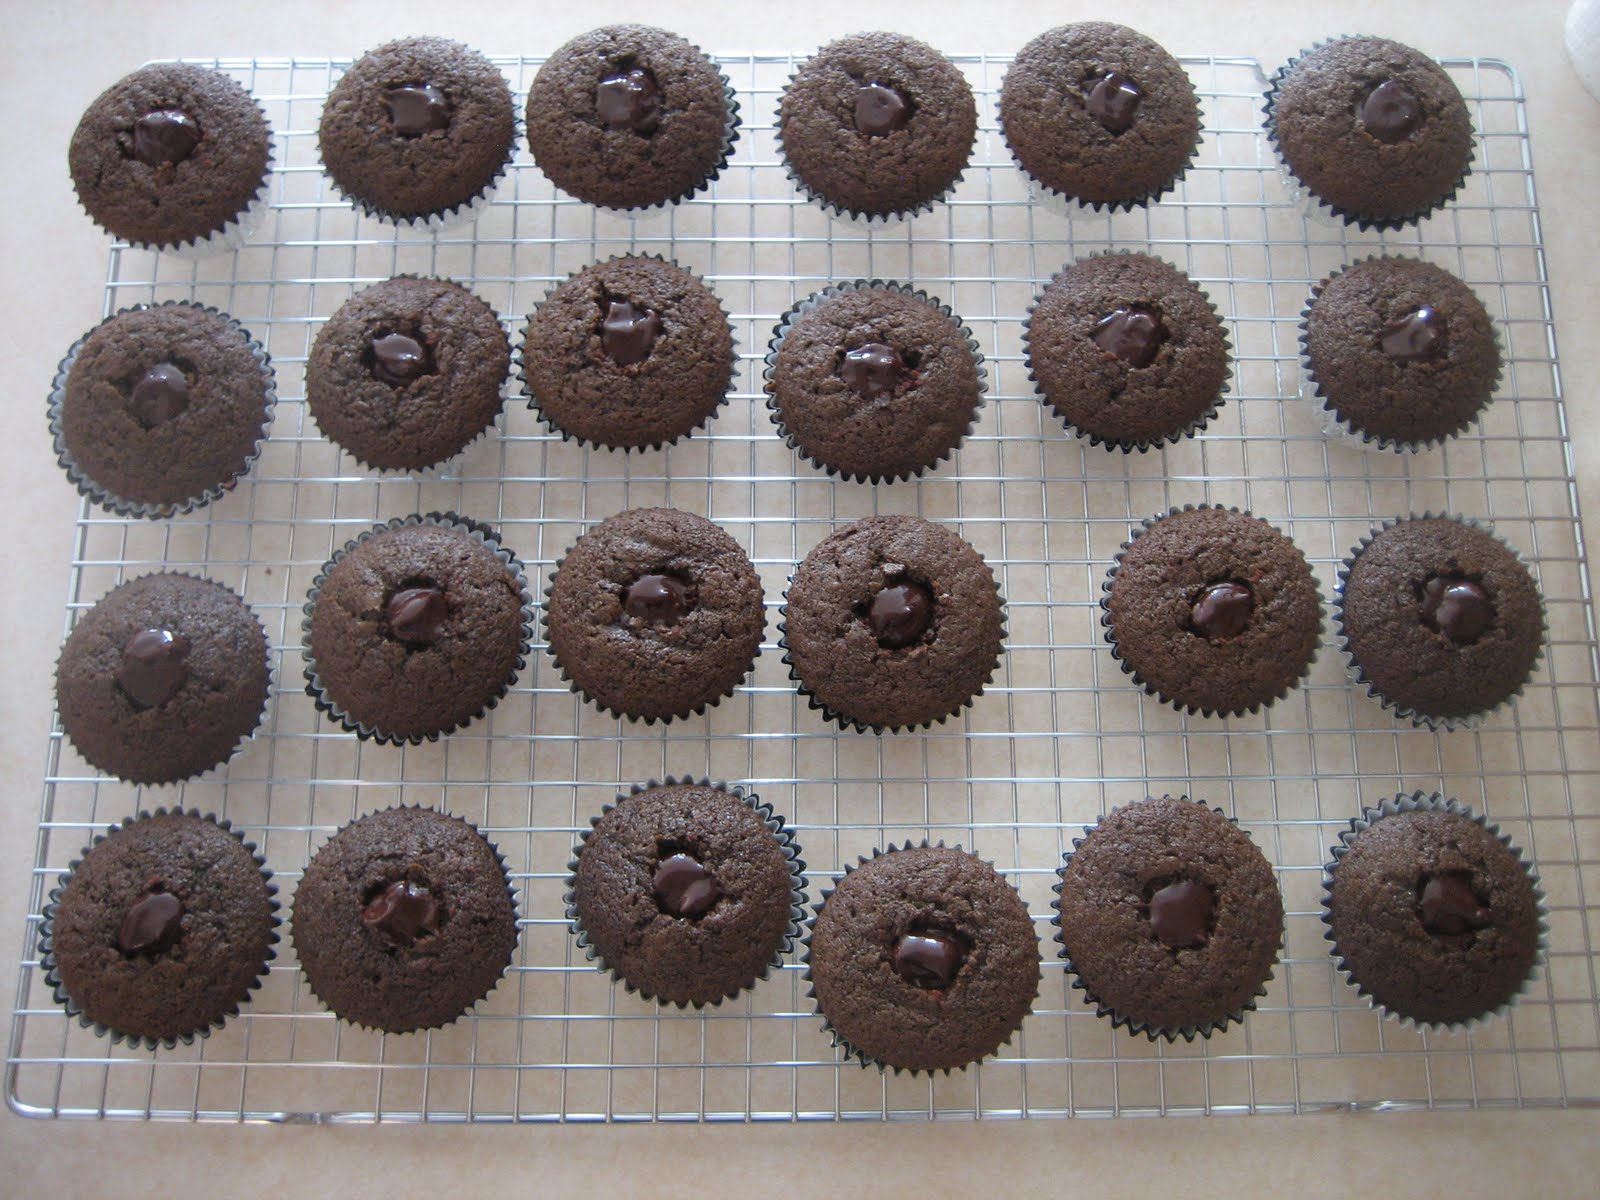
For this year's Super Bowl, I decided to attempt Irish Car Bomb cupcakes. I've had a simplified version before, made from a Duncan Hines devil's food cake mix and without the bomb in the center. The whiskey/chocolate ganache really makes these cupcakes "da bomb". The cake itself loses most of the Guinness flavor after baking, but helps keep the cake rich and delicious. It also seems to keep the cake moist. I love the Irish cream in the butter frosting, it's quite potent.

This recipe makes 2 dozen cupcakes. Bake at 350 for 18-20 min. cool completely before adding the filling.

Devil's food cake with stout

1 cup Guinness
1 cup butter
3/4 cup unsweetened cocoa powder
2 cups flour
2 cups sugar
1 1/2 tsp baking soda
3/4 tsp salt
2 eggs
2/3 cup sour cream

Ganache Filling

8 oz bittersweet chocolate
2/3 cup heavy cream
2 tbsp butter, room temperature
3 tsp Irish whiskey

Irish Cream Frosting

4 cups powdered sugar
1 cup butter, room temperature
4 tbsp Bailey's Irish cream

Instructions

combine butter and stout over medium-low heat. Drink what's left in Guinness bottle while butter melts.


add cocoa powder, stir until well combined. remove from heat and cool slightly.


mix together eggs and sour cream. add chocolate mixture and beat until combined.


in a separate bowl, whisk together all dry ingredients and add slowly to wet ingredients. fill baking cups 3/4 full.


after baking, remove from pan onto cooling rack. allow to cool completely before inserting filling.


when cooled, cut 1" round holes in tops of cupcakes, and cut about half way through the center of the cupcake.


to make filling, chop chocolate into small pieces. heat cream on stove until heated through (do not boil). pour over chocolate and stir until chocolate is completely melted. add butter and whiskey and mix well. let cool slightly before filling pastry bag (use a wide tip attachment).


fill the holes in the cupcakes to the top.


allow ganache filling to set before frosting. make sure butter is at room temperature and beat for a few minutes until fluffy. add sugar slowly and mix until well combined. add Irish cream. frost cupcakes generously and enjoy!


Sunday, March 14, 2010

Happy Pi Day

Well, it's been way too long since my last post, and since it's 3.14 (Pi Day), it's high time for some pie worship. I was just thinking it would be cool to bake a pie with the pi symbol cut in the top for the steam vents. I'll have to consider that for next year. Today is actually not a pie baking day for me, but a ginger cookie day. It was the only treat I could make without a trip to the grocery. It's a really stormy day, so staying in to bake cookies works for me just fine.

3.14 is a pretty important day. In addition to it being the day we all celebrate Pi (thanks to this crazy dude: http://en.wikipedia.org/wiki/File:Prince-of-pi.jpg) it's Einstein's b-day. But who cares about him, because it is also happens to be my Grandma Nellie's birthday. She would have been 96 today. She died only a couple of months after her 94th birthday. 


Happy Birthday, Grandma!


Grandma would have loved these ginger cookies. I wonder if I ever made them for her? I only discovered the recipe from my Aunt at Christmas 2007. It's a fantastic recipe:

Ginger Cookies

cream together:
3/4 cup butter
1 cup sugar
1/2 cup molasses
1 egg

sift together:
2 cups flour (more if necessary)
1/4 tsp salt
2 tsp baking soda
1 tsp cinnamon
1 tsp cloves
1 tsp ginger

mix well, add extra flour if dough is too sticky.
roll into small balls, dip in sugar.
place 2" apart on a greased cookie sheet (I use parchment paper)
bake at 350 for 8 min. let cool on sheet before transferring to cooling rack
makes approx 4 dozen cookies

The cookies will look puffy when you first take them out of the oven, but will flatten out nicely after they've cooled:


Ok, back to PIE.

Spring is almost here and I look forward to seeing some rhubarb in the stores and friends' gardens to make some tasty treats. I wanted to make some strawberry rhubarb jam last fall, but of course it was too late for either of those fruits. Well, rhubarb is technically a vegetable, but we won't tell anybody. My friend Chris grows some awesome rhubarb in his yard. Hopefully he'll be a pal and save some for me this year. It might require a rhubarb pie in exchange. Let's just hope I get my pie pan back within a reasonable time frame. It seems like forever ago, but I made him this tasty strawberry rhubarb pie as a goodbye treat when he left the company we both worked for. (I, sadly, am still there.) I recall how the group of us enjoyed the pie after a nice lunch as Sushi Ya. Our waiter also had a slice and really liked it. The recipe is pretty basic:

Strawberry Rhubarb Pie

1 cup sugar
2 tbsp cornstarch
2 tbsp quick cooking tapioca
pinch of salt
3 cups fresh strawberries, hulled and quartered
3 cups fresh rhubarb, sliced 1/2" thick (about 4-5 stalks)
1 tbsp cold butter, cut into small pieces

Mix together all dry ingredients
Sprinkle on top of strawberries & rhubarb, toss to distribute evenly
Transfer to dough-lined pan and dot with butter.
Place top crust over filling, trim edge, crimp to seal & cut steam vents
Place in refrigerator for 20-30 min, preheat oven to 350.
Bake the pie on lower third rack for 50-60 min, when the filling is thick and bubbling.
Allow to cool completely on rack before serving. Serve at room temperature or warm in oven at 350 for 10-15 min

Pie dough (double recipe for bottom and top crusts)

1 1/4 cups all purpose flour
1 tbsp sugar
1/4 tsp salt
1/2 cup cold unsalted butter (cut into 1/4" cubes)
3 tbsp very cold water

Stir together dry ingredients.
With a pastry blender, add cubed butter to dry ingredients and mix until butter pieces are pea-sized.
Add water one tbsp at a time and mix just until the dough pulls together.
Form into a ball, flatten to a disk and roll out.


This is the pie I made for Chris.