Tuesday, June 5, 2012

Because the right pair of shoes can change everything...


"Sparkly and witty as a 1940s screwball comedy, and filled with quirky characters and lots of delightful surprises, Rita Hayworth's Shoes is a story of bouncing back, a heartwarming--and potentially heartbreaking--romance, and even a mystery rolled into one fun, hilarious page-turner."

Great Writing Inspires Great Baking

Rita Hayworth's Shoes is now available through Diversion Books. To get the word out, my sugar cookies will be distributed at Book Expo America, June 6 at the Javits Center in NYC.

To get started on the project, I first had to find the right shoe to represent the book. I was lucky to find the perfect, somewhat retro-looking high heel cookie cutter at Michaels craft store.


The cookies and icing are recipes from Martha Stewart, which is the easiest to make and everyone loves.

Sugar Cookies
2 cups all purpose flour
1/2 tsp baking powder
1/4 tsp salt
1/2 cup butter
1 cup sugar
1 large egg, slightly beaten
2 tbsp milk
1/2 tsp vanilla

Cream butter and sugar. Add dry ingredients until incorporated. With mixer running, add egg, milk and vanilla. Shape into two disks, cover in plastic wrap, refrigerate at least 1 hour. Roll out to 1/8" thickness and cut with cookie cutters. Bake at 350 on parchment-lined baking sheet for 10 min. Do not overbake. Allow to cool slightly on cookie sheet before transferring to wire rack. When completely cool, decorate with royal icing.

The recipe is supposed to make only 2 dozen cookies but I probably get 3 dozen. I also find that dividing the dough into 3-4 disks makes the rolling/cutting process a lot easier.


Royal Icing
4 cups powdered sugar
5 tbsp meringue powder
1/3 cup water
juice from one lemon

mix until well incorporated. add food coloring (gel-based is preferable). Can be stored in air tight container for up to 3 days.

To add a little bling effect to the shoes, i sprinkled with red sugars immediately after frosting the cookies. Royal icing hardens when exposed to air so it's best to add embellishments before the icing sets. I also added a pearlized sprinkle to each shoe to enhance the retro look.


The process was a bit tedious, having to frost, add the sugar and pearl embellishment one by one, rather than frosting all the cookies first, etc. But I think that adding the red sugars made the cookie "pop" and was worth the extra effort.


To package the cookies up, I used small cellophane bags and sparkly sheer ribbon found at Michaels. I designed, printed and trimmed the hang tags. A cutting board and hole punch are must-haves!


Monday, May 7, 2012

Irish Car Bomb Cupcakes

Ok, i've already posted on this particular recipe (Superbowl 2011), but I had to make it again recently, this time for a "Boozy Treats" theme for the baking club at work. The cupcakes feature a trio of Irish drinks: Guinness (for the cake), Whiskey (for the chocolate ganache "bomb") and Bailey's for the buttercream frosting. I decided to try making pint glasses out of fondant, with a Guinness logo. The pint glasses were easy to make, I simply tinted the fondant a rich brown and cut into the shape of a Guinness pint glass. To create the head, I just topped them off with frosting using a pastry bag with a round decorating tip. I cut the harp out of fondant and added detail using black frosting. These would be great for St. Patrick's day next year.

Super Mario Baking Project

The baking club at work gathers every other Monday to share our baked goods based on a predetermined theme. This week we all contributed to a Super Mario game board made completely out of baked goods (the only exception was the background graphics). We had a list of characters to choose from and I wanted to try making marzipan figurines, but was unable to get it together for this time. So I volunteered to make Fire Flower sugar cookies with royal icing. I thought this project wouldn't be too challenging, but then I wondered how I would make uniform shapes without a cookie cutter. I tried at first to do it freehand using a paring knife, but I was really unhappy with the way they turned out. So I rummaged through my stash of cookie cutters and found some leaf cookie cutters that would work, and then used a small water glass to cut out the flower. Then I carefully pressed the leaves against the flower. I decided against making a stem because i knew it would break easily. The cookies baked nicely and the next task was to frost them using four different colors of royal icing (plus black frosting for the eyes). Here are the cookies with the white center frosted:
Next I painted the leaves:
To apply the yellow and red rings around the white center, I used a pastry bag to pipe the frosting, which made nice, even rings. For the eyes, I used Wilton Black Decorating Icing.
I think the cookies turned out pretty good. Here's one with the cut out I had tried using as a template:
Everyone did a really awesome job with their baking. I thought the display was especially impressive. The Goomba cupcakes were great and the Thwomps were made out of marshmallows.

Monday, April 16, 2012

Mini English Tea Cakes


Today we held a bake sale at work. The theme was "Spring" although it's felt more like Summer the past few days. The sale was set up to benefit two charities and we managed to raise over $1700! There were at least twenty participating bakers, and some made up to four different treats. I was much too lazy to bake more than one. I decided to make these mini tea cakes that were a big hit at my Regency party last year. My sister gave me an awesome tea cake pan from Williams-Sonoma which came with a pretty good recipe on the package, which I kept. The recipe makes 60 cakes. For the bake sale, I thought it would be best to sell them in threes, so i wound up with 20 units.


To make the cakes:
1 1/3 cups flour
3/4 tsp. baking powder
1/4 tsp. salt
1 stick butter, softened
3/4 cup sugar
2 eggs, lightly beaten
1 1/2 tsp. vanilla
1/3 cup milk
(I wanted these to be lemon flavored, so I added 1 1/2 tsp lemon extract)

Sift dry ingredients, set aside. mix butter and sugar in electric mixer until light and fluffy, about 5 min. Add eggs slowly, plus vanilla and lemon extract. reduce speed to slow and alternate adding the dry ingredients and the milk. Fill cake pan with about a tablespoon batter in each well. Bake 10 min at 350. Allow pan to cool on rack before removing the cakes. Allow cakes to cool at least 1/2 hour before adding the icing.


Glaze:
8 cups powdered sugar
4 egg whites (I used 1/4 cup meringue powder + 1/2 cup milk instead)
1/2 cup milk
2 tbsp vanilla (I used 4 tsp lemon extract instead)
Food coloring (I used gel coloring)

Whisk all ingredients together for about 1 minute. Add food color as desired. Make sure cakes are on a wire rack. Drizzle glaze over each cake, slowly for good coverage. I found it easier to dip the cake in the glaze and let the excess drip off. I think the glaze recipe can actually be cut in half, since I found there to be a lot of it leftover, and all the cakes were generously covered. It also makes a big mess.


This is all the leftover glaze. There was some in the mixing bowl as well.


The packaging for the cake pan makes it look like your cakes will have these perfect and very distinct shapes. Not so.


I wanted to make the packaging look as pretty and professional as possible. So I spent some time making these labels:


Here they are, all ready for the sale! I had this leftover ribbon to make them look pretty. I save ribbon for things like this. Plus, the colors were perfect.


Here's the table in the cafeteria at work. I was really impressed with treats everyone contributed.


And here's my display. It was nice to hear that everyone thought I'd bought these, rather than make them myself. If only they knew I'd done all this on just 4 hours of sleep.

Sunday, March 18, 2012

Mad Men Cupcakes


The Inspiration

Mad Men fever is back! As any fan knows, next week is the season premier after a seemingly endless break. While I don't plan to hold a viewing party, I had reason to celebrate the show this weekend because my friend Daphne's well-timed Mad Men themed birthday party was held last night. The party was such a blast, everyone really got into the spirit of theme - lots of slim-fitting suits, strands of pearls and up-dos. I thought about bringing classic cocktail-inspired cupcakes, or even the crowd-pleasing Irish Car Bomb cupcakes, especially since yesterday happened to be St. Patrick's Day (see my post from the 2011 Superbowl). In the end, I decided to go with a simple chocolate devil food cake with butter cream frosting. This would allow the time I needed to focus on a new challenge: fondant decorations. I've never worked with fondant before, so this was definitely uncharted territory for me, but felt like this would be the perfect opportunity to try something new. At first i thought of creating images of cocktail glasses, but felt like that wasn't right...it could be for any party. The challenge for me was to find something that was specific to Mad Men. That's when I realized I had the perfect tool to create the images I needed - MadMenYourself.com. I went to the site and created six new avatars - 3 men and 3 ladies:


Fun with Fondant

I bought a package of Wilton's rolled fondant which is plain white and comes in the shape of a brick. i divided it into sections to dye. i used Wilton's concentrated gel food coloring. It was very easy to work with and the fondant took the color very well. I recommend using thin latex gloves when working in the dye. Red dye especially doesn't wash off very easily - my palms were still pink after several washings.

The Arsenal:


I dyed all the fondant I thought I would need, and wrapped each color in plastic to prevent it from drying out. I then started work on getting the templates made for each character. I decided to make the images as large as possible, which meant only the head and shoulders would fit on top of the cupcake. I worked on each component in sections: head, hair, clothes and accessories. I saved the facial features for last.

Heads (with facial features partially completed), Hair, Clothes & Accessories:


When working with fondant, if it starts to get too sticky, you can use a little cornstarch on the work surface. Use only a little bit though. The fondant should be at room temperature and rolled out to about 1/8" thickness. When putting together the components, the fondant should be pliable so each piece can stick together. i kept the pieces flat in a zip lock bag until I was ready to use them. For any pieces that were not sticking together, I used some of the buttercream frosting as glue. To make the faces, i "drew" the features using the pointed tip of a wooden skewer to make the impression and then painted over it using decorating icing from a tube (I used Wilton). I don't recommend using decorating gel because it's too sheer. I also find decorating using small paint brushes easier than using a decorating tip - I find those hard to control at times, especially with very small details).

Putting together the characters was a lot of fun, it felt like playing with Colorforms as a kid.

Partially-completed:


In the end, I was pleased with the outcome. I spent a lot of time working on the facial features, which caused the fondant to dry out a bit, but they held up pretty well when applying the hair and accessories. The cupcakes themselves turned out to be the most frustrating. I tried this "one bowl" devil's food cake recipe on the package of Ghiradelli chocolate I had. It was intended for a 9x13 cake pan and when the cupcakes came out of the oven, they immediately collapsed. Pressed for time, I wound up buying a Duncan Hines devil's food cake mix. At least the buttercream I made was flawless.

Mad Men Ladies (on a vintage platter):


I love this chick, she's sassy:


Here are the six characters that are as close to the originals I created on the Mad Men site:


And here's all 18 (i made just enough to fill my cupcake display stand):

Wednesday, March 14, 2012

Happy Pi Day!


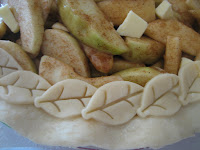
One day I will make a Pi pie like the one above, but for now, I'll just post some of the pies i've baked in the past year or so that never got blogged.

1. Unbaked Strawberry Rhubarb Pi


2. Mini Blueberry Pi


3. Thanksgiving Day Apple Pi